
On this information, we’ll stroll you thru including an earthquake/vibration sensor to your current ESP32-based LoRa Meshtastic Node. This information works for any ESP32-based board like Heltec V3 Lora, TTGo, or T-Beam with minor changes.
{Hardware}
Let’s begin with the parts you may want:
📢
When ordering from AliExpress, take into account consolidating your purchases from a single vendor to maximise financial savings. For example, for those who’re buying an antenna from vendor X, examine if in addition they supply jumper wires or sensors. By sourcing a number of objects from one vendor, you’ll be able to considerably scale back transport prices.
Meeting
Now that you’ve got your parts, let’s proceed with the wiring. We’ll comply with these schematics:
SW-420 Vibration Sensor – Heltec Lora v3 Connections
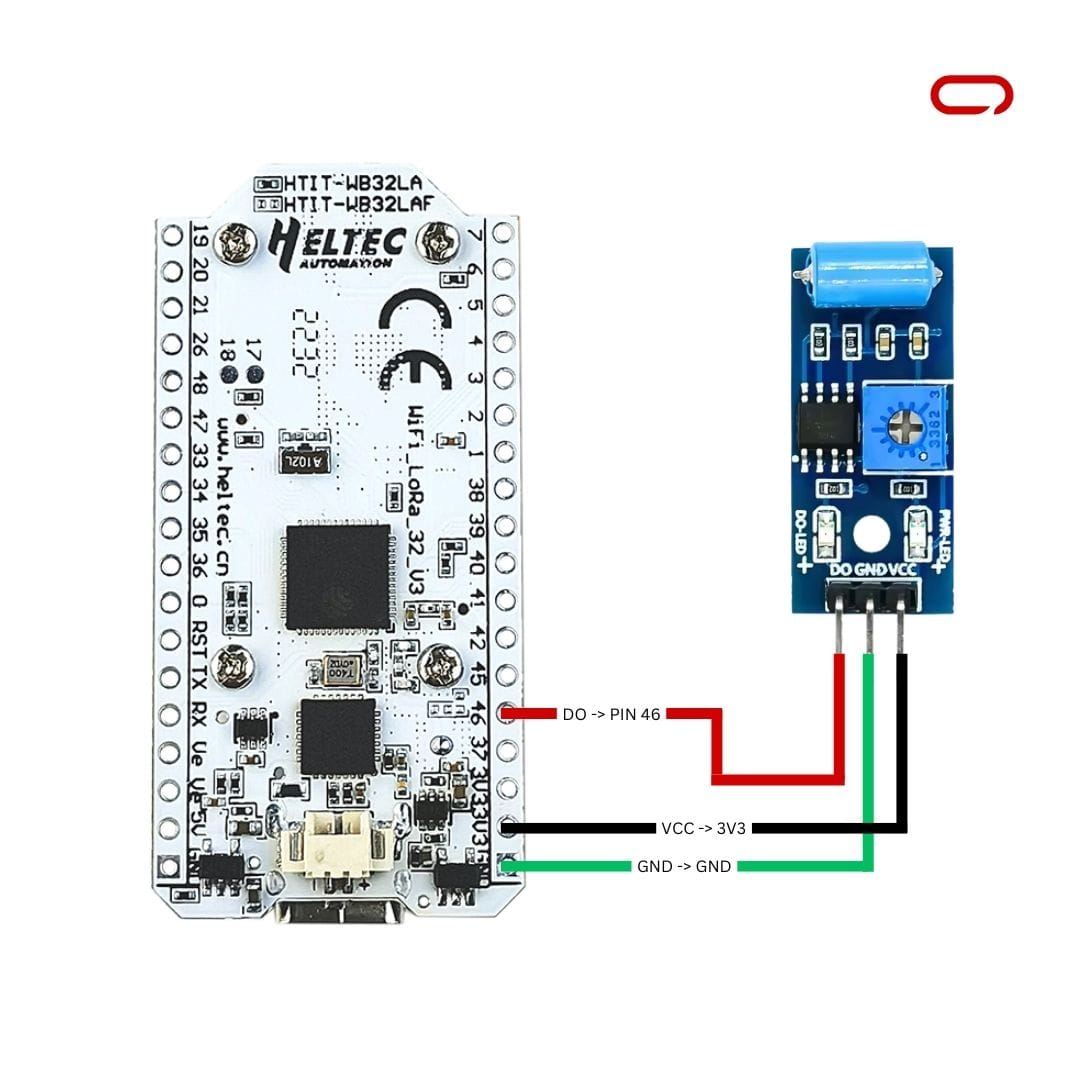
- VCC → 3V3
- DO (digital Output) → PIN 46 (or any accessible GPIO pin of your selection)
- GND → GND
💡
In the event you’re utilizing a distinct ESP32-based board like TTGo or T-Beam, merely choose an accessible GPIO pin that accepts digital alerts, helps pull-up resistors, and is not already in use. Then, comply with the information utilizing the chosen pin, disregarding the precise pin quantity talked about within the directions.
💡
The order of connections may fluctuate by element mannequin. At all times comply with the labels in your particular parts and the offered schematics to make sure correct wiring.
As soon as all wiring is accomplished, double-check your connections and guarantee they match the advised format earlier than continuing to the following steps.
Meshtastic Settings
On the Sensor System
- Open Meshtastic App (iOS/Android/Internet)
- Go to the Settings web page
- Within the module configuration part, go to Detection Sensor
- Toggle the swap to allow it
- Give the sensor a reputation (e.g., “Earthquake Sensor”)
- Set GPIO PIN to watch to PIN 46 (or whichever pin you used)
- Press Save
💡
Detection Set off Sort needs to be Excessive for the SW-420 module because it pulls HIGH when vibration is detected and LOW when idle
On the Consumer System
- Open Meshtastic App (iOS/Android/Internet)
- Go to the Settings web page
- Within the module configuration part, go to Detection Sensor
- Toggle the swap to allow it
- Proper beneath the toggle, choose “Consumer” this time
- Press Save
Testing and Calibration
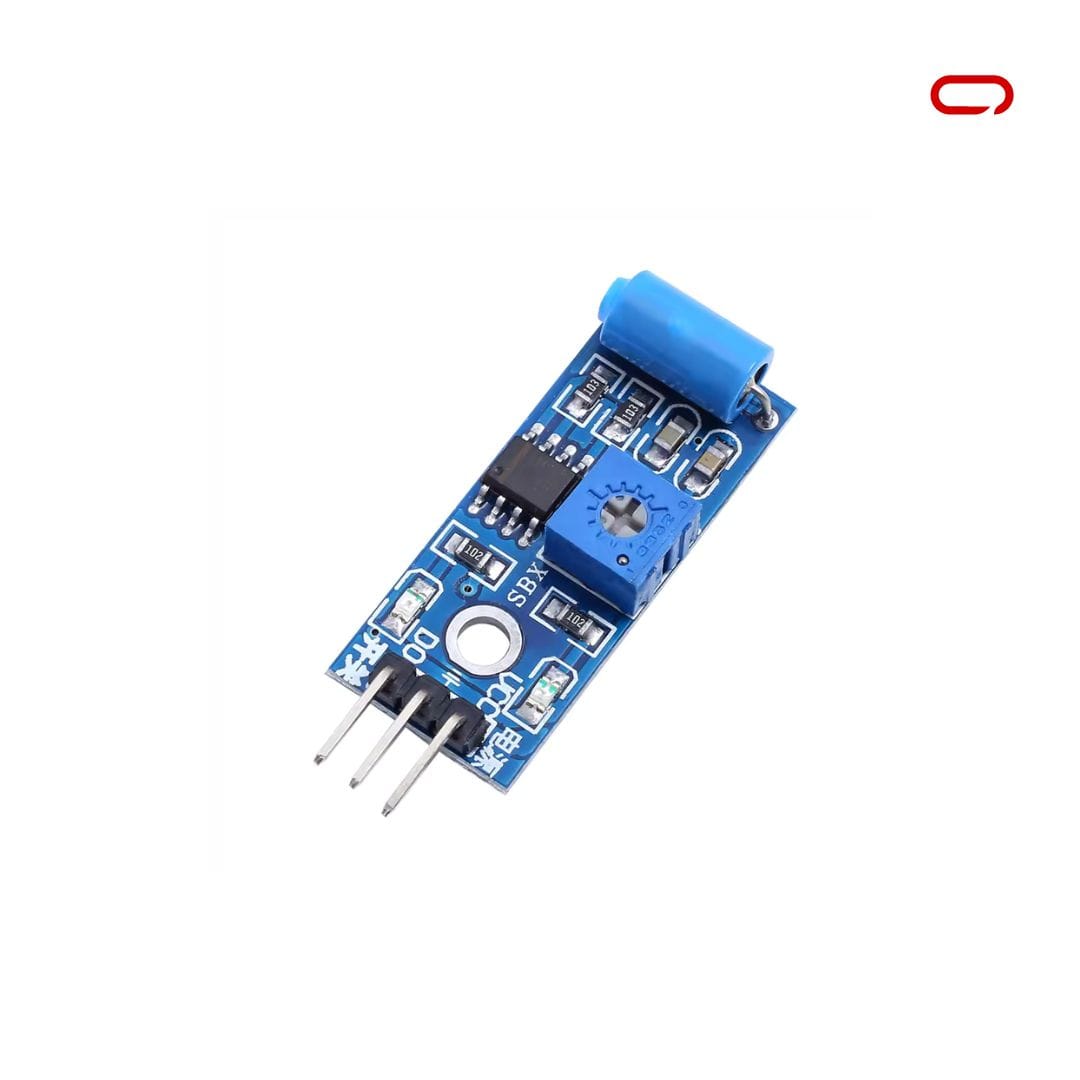
The SW-420 vibration sensor has an adjustable sensitivity through the potentiometer on the module:
- Begin with the potentiometer within the center place
- Use a small screwdriver to regulate sensitivity:
- Clockwise: Decreases sensitivity (requires stronger vibration to set off)
- Counterclockwise: Will increase sensitivity (triggers with lighter vibration)
Discovering the fitting steadiness is essential:
- Too delicate: Might trigger false alarms from wind or footsteps
- Not delicate sufficient: Would possibly miss precise seismic occasions
Conclusion
This information has walked you thru integrating an earthquake/vibration sensor together with your ESP32-based Meshtastic Node. The SW-420 gives fundamental detection capabilities good for DIY early warning techniques inside your mesh community.
Do not forget that in case your sensor is predicted to be triggered incessantly (comparable to in areas with common minor tremors), take into account setting detection limits within the Meshtastic settings to keep away from saturating the community. Try our Channel Utilization post for extra info on optimizing community visitors.
Discover the potential of your Meshtastic Node by experimenting with totally different sensitivity settings and placements to create an efficient early warning system to your mesh community. Completely happy constructing!