 Sensor To DIY ESP32 Meshtastic Gadget With BME280")
Learn to add a BME280 sensor to your DIY ESP32 Meshtastic Node for real-time temperature, humidity, and air strain monitoring. This information covers {hardware} setup, wiring, and Meshtastic app settings—excellent for enhancing your LoRa mesh community with environmental information.
On this information, we’ll stroll you thru including a telemetry sensor (BME280) module to your present DIY ESP32 Meshtastic Node to measure air strain, temperature, and humidity.
Meshtastic DIY – How To Build Your Own Meshtastic Node ESP32 & Lora Radio
Create your own Meshtastic LoRa Node with our easy DIY guide. A complete step-by-step for building your customized mesh communication system
{Hardware}
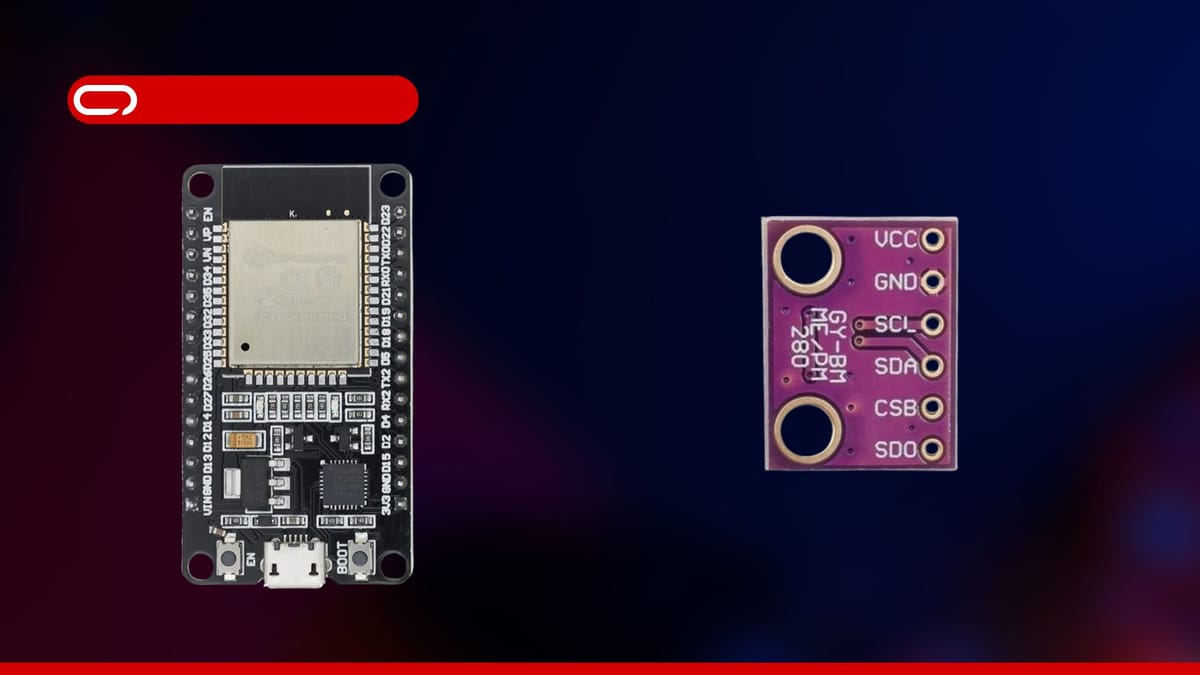
Now let’s get began with the {hardware} you want:
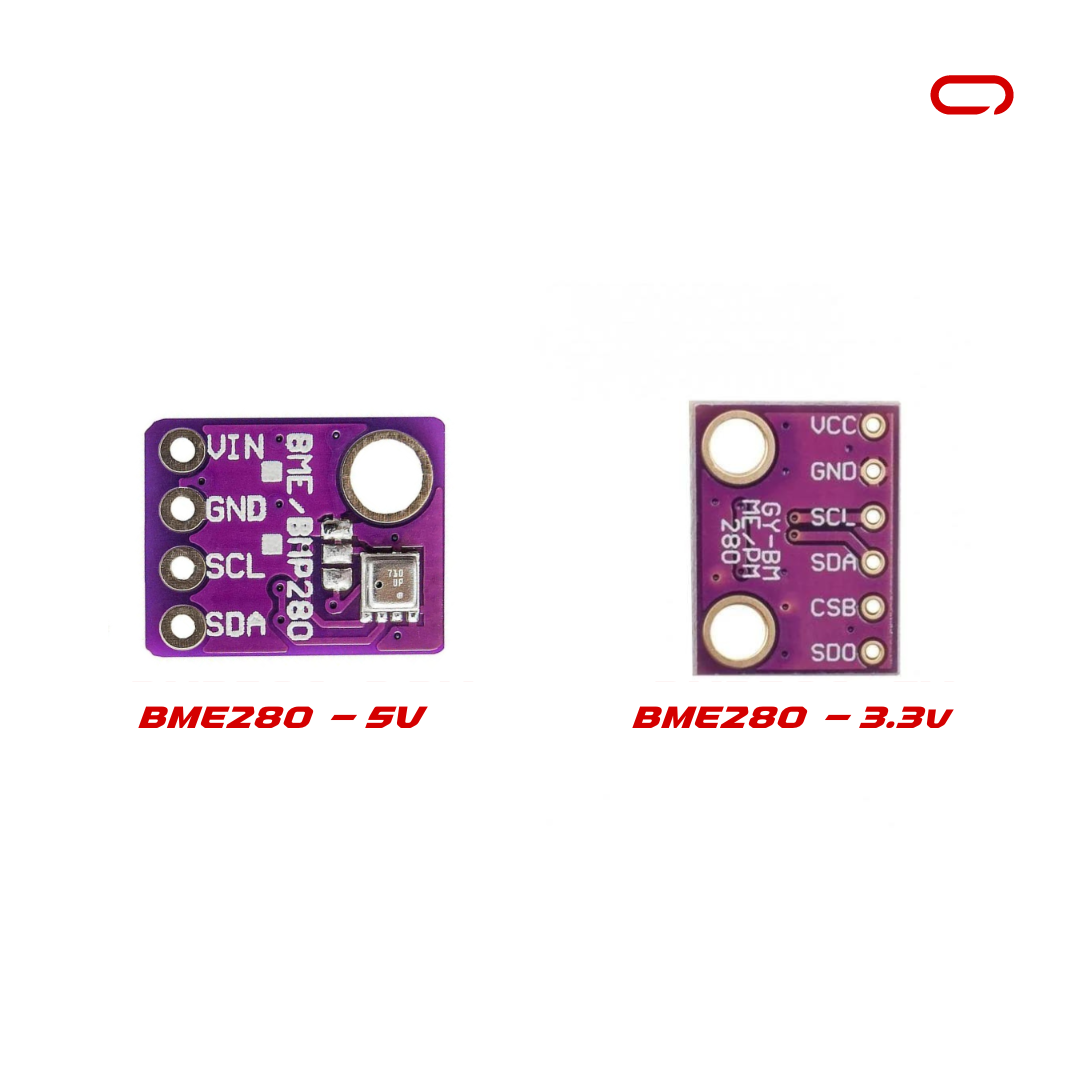
💡
BME280 sensor is available in two flavors 5V and three.3V. Select both 5V or 3.3V based mostly in your system necessities
📢
When ordering from AliExpress, contemplate consolidating your purchases from a single vendor to maximise financial savings. As an example, in case you’re buying an antenna from vendor X, test if additionally they supply an IPEX to SMA-Okay cable. By sourcing all of your objects from one vendor, you’ll be able to considerably scale back transport prices.
Whilst you can modify this {hardware} choice, we have chosen available elements. Notice that soldering is just required to connect headers to the ESP32 improvement board and the BME280 module. This step will be outsourced to a neighborhood electronics store in case you desire to keep away from soldering your self.
Meeting
The {hardware} is all prepared and set now to the wiring. For this, we are going to comply with the next Schematics.
💡
Please bear in mind we’re assuming right here you already soldered the headers on the board so it is going to be a matter of connecting pins to the proper place.
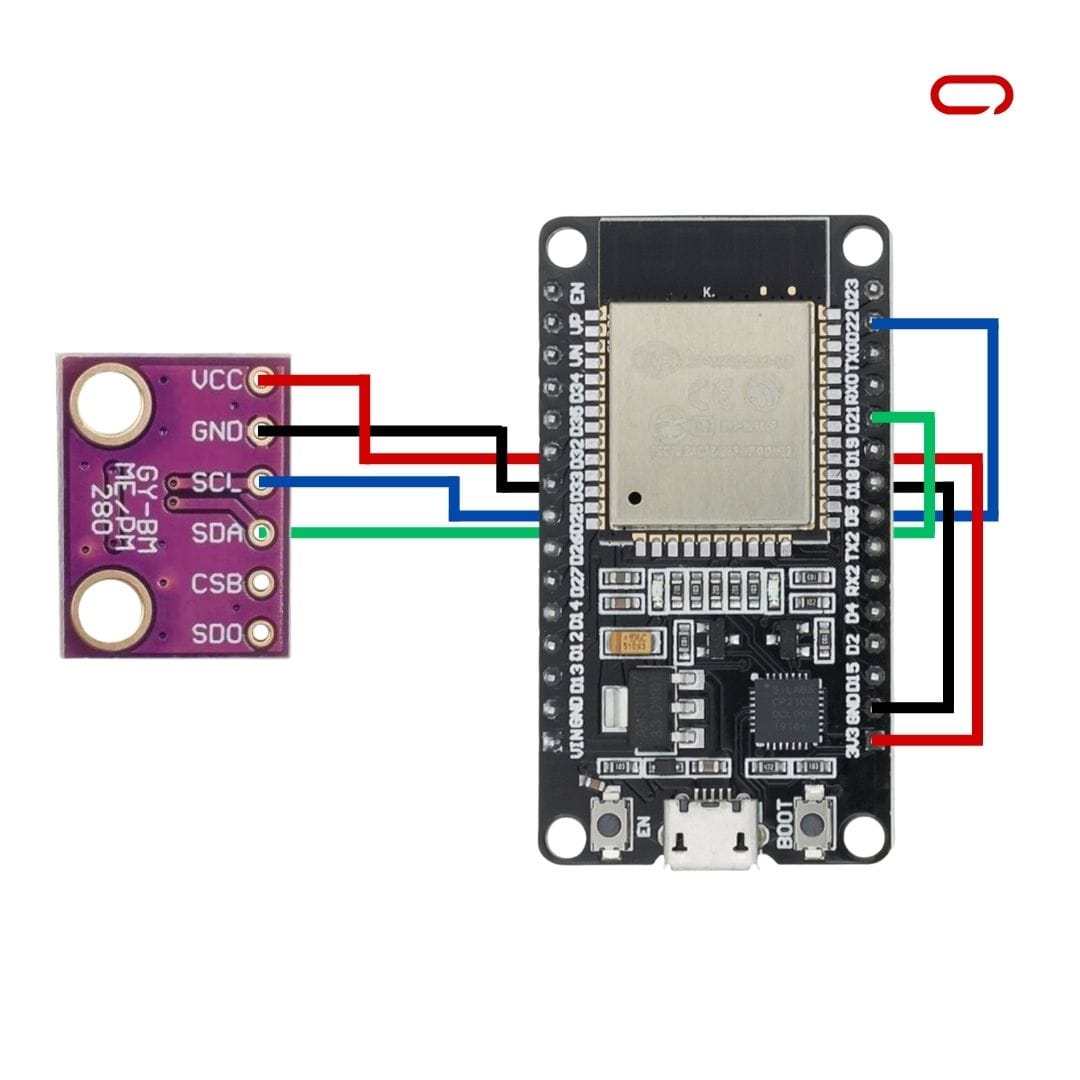
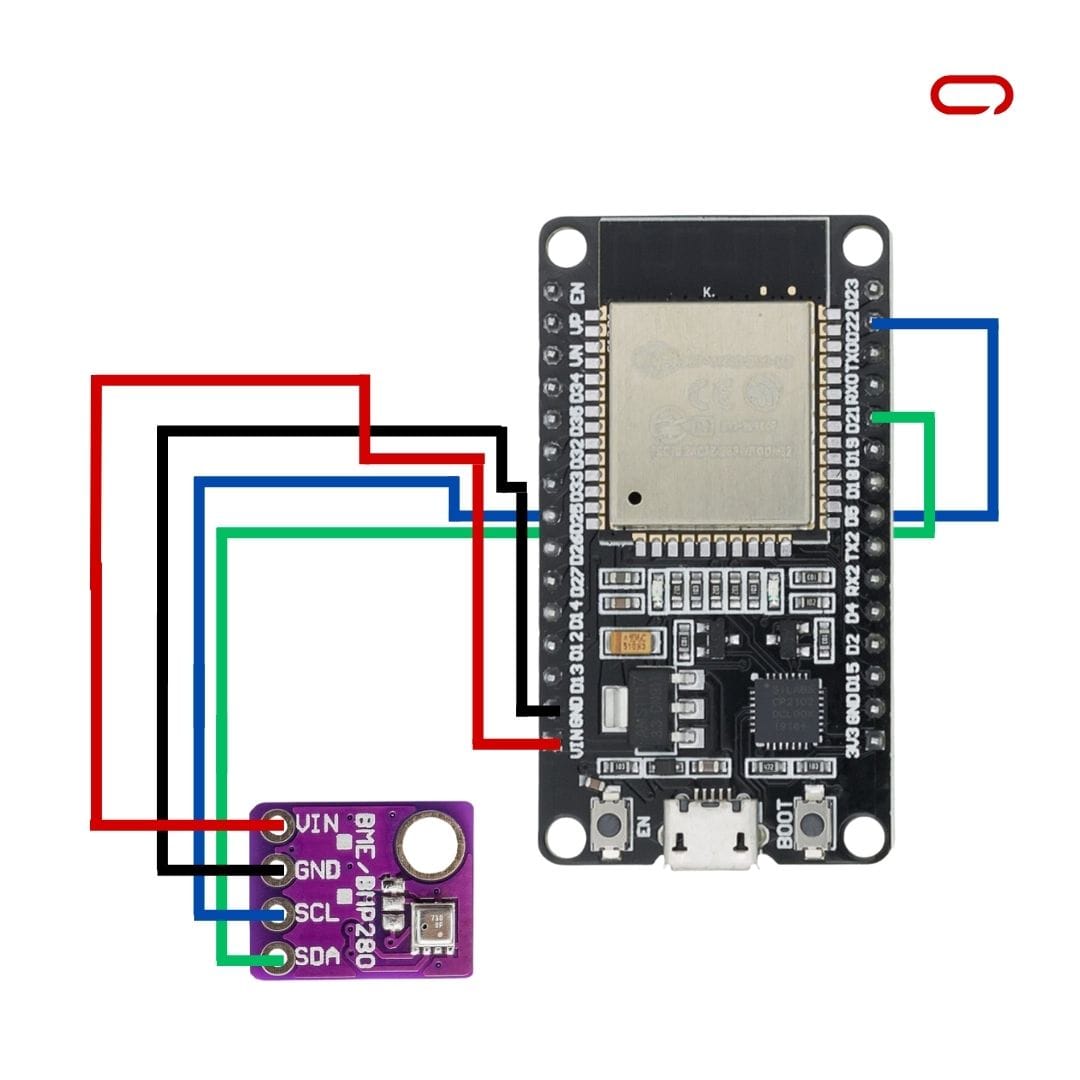
BME280 Telemetry Module → DIY ESP32 Meshtastic Node
- VCC/VIN → 3.3V Pin
- SCL → GPIO 22 (Default I2C Clock)
- SDA → GPIO 21 (Default I2C Information)
- GND → GND Pin
💡
In case you have a show linked to the identical I2C pins, you’ll be able to join the BME280 in parallel with the show.
💡
Including decoupling capacitors is sweet observe to isolate totally different components of the circuit from one another.
💡
Essential Notice: The precise pin format could differ in your particular ESP32 board. All the time comply with the labels and pin designations in your elements and the supplied schematics to make sure correct connections. Double-checking these particulars will assist stop potential points or element injury.
After finishing all connections, confirm that they match the beneficial configuration earlier than continuing to the following stage.
Meshtastic Settings
- Open Meshtastic App (IOS for this information)
- Go to the Settings web page
- Within the module configuration part go to Telemetry (Sensor)
- Scroll right down to the Sensor Choices
- Toggle the change Allow and different switches in response to your desire
Conclusion
Including a Telemetry module to your DIY ESP32 Meshtastic Node is an easy course of that considerably enhances your gadget’s capabilities. The BME280 module gives dependable environmental monitoring at an reasonably priced worth, and the ESP32’s strong I2C implementation ensures steady communication. Whereas some soldering could also be required, this may be simply delegated to a neighborhood electronics store if wanted. By following this information, you’ll be able to efficiently combine environmental sensing performance into your Meshtastic community, enabling the gathering and sharing of temperature, humidity, and air strain information throughout your mesh community. The ESP32 platform’s flexibility additionally permits for future enlargement with further sensors on the identical I2C bus.